
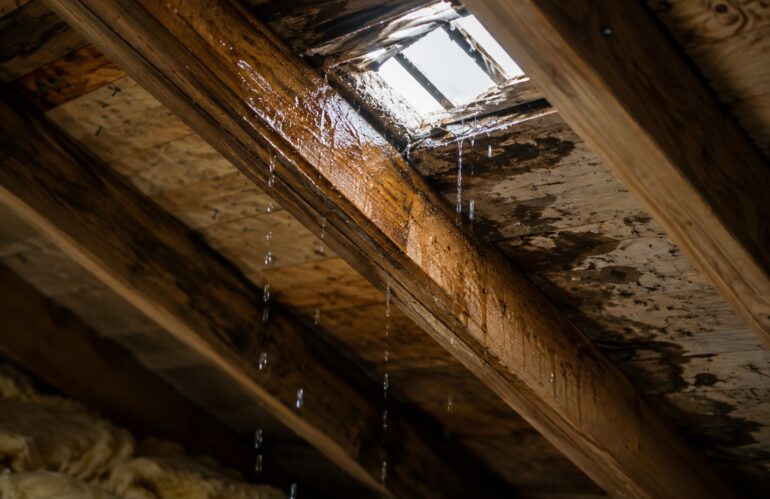
Here is the single most useful fact about roof leaks, and the one almost no article leads with: water travels before it drips. The stain on your ceiling is almost never directly beneath the hole in your roof. Understanding how to find a roof leak means learning to trace water backward and upward to its actual entry point, which is a skill you can pick up in an afternoon. Do it now, in the last dry weeks before snow, while a leak is still findable and fixable. Once there is snow on the roof, everything about this gets harder.
QUICK ANSWER
To find a roof leak, start in the attic on a dry day and trace water stains upward to the highest point of moisture, since water travels down rafters before it drips. Then inspect the roof above that point for failed flashing, cracked boots around vents, and missing shingles.
Why the ceiling stain is never under the hole
Water enters the roof assembly at a defect, lands on the underside of the deck or on a rafter, and then does what gravity tells it to do. It runs along the rafter, following the slope, sometimes for ten or fifteen feet, until it reaches a low point, an obstruction, or a nail. Only then does it fall onto the insulation and eventually through the ceiling.
The practical consequences of this are worth stating plainly:
- The entry point is almost always uphill from the stain, and often significantly sideways from it too.
- Cutting into the ceiling under the stain tells you nothing about where the water is getting in.
- A single entry point can produce stains in two rooms, if water splits at a framing member.
- The stain grows slowly, which means the leak is usually months older than the day you noticed it.
This is exactly why the attic, not the roof surface, is where a leak hunt starts.
The attic-first tracing method, step by step
Pick a dry day, ideally the day after rain so evidence is fresh but conditions are safe. Bring a bright flashlight, a phone for photos, and a piece of chalk or a marker.
- Turn off the attic light and let your eyes adjust. Scan the entire roof deck for daylight. Pinholes of light are entry points, full stop, and this thirty second step sometimes ends the search immediately.
- Find the stain from below and get above it. Locate the corresponding position in the attic, then start working uphill from there rather than examining that spot.
- Follow the rafters upward. Shine the light along each rafter and the underside of the deck. You are looking for dark staining, water tracks, mineral deposits, or a discolored trail that runs down the wood.
- Find the highest point of moisture. Keep going up until the staining stops. The last wet or stained spot before clean wood is your entry zone.
- Check the fasteners. Rusted or dripping nail tips indicate either a leak or condensation, and knowing which one matters enormously. Widespread rusty nails across the whole attic is a ventilation problem, not a roof problem.
- Mark the spot and measure it. Chalk the deck, then measure the distance from the ridge and from the nearest gable wall. Those two numbers let you find the same location from the outside.
- Photograph everything. Wide shots for context, close shots for detail. If a claim follows, this is your documentation.
Then go outside and inspect the roof surface at the measured location. Nine times out of ten the culprit is directly above it.
The top five leak sources, in the order we find them
- Flashing at walls, chimneys, and skylights. The most common source by a wide margin. Step flashing that was reused during a previous re-roof, or counter flashing that has pulled away from a chimney, will leak reliably. Our explainer on roofing flashing shows how these pieces are supposed to work.
- Cracked vent boots. The rubber collar around a plumbing stack has a service life of roughly ten to fifteen years, considerably less than the shingles around it. Utah UV cracks them early. This is the single most common repair we perform, and it is inexpensive.
- Valleys. Two slopes worth of water funneled into one channel. Debris accumulation, failed valley metal, or improperly cut shingles all produce leaks here.
- Ice dam backup. A winter specific mechanism. Meltwater refreezes at the eaves and backs standing water up under the shingle courses. Nothing on the roof is broken, which is why this one confuses homeowners so much.
- Exposed or backed-out fasteners. Nails that were overdriven, underdriven, or placed outside the nail line. Every exposed head is a hole. This is also the leading cause on metal roofs, covered in our guide to finding a leak in a metal roof.
The hose test, and how to do it safely
When attic tracing narrows the area but does not pinpoint it, a controlled water test will. This is a two person job and it takes patience.
- One person in the attic, one on the ground with the hose. Stay in phone contact. Nobody needs to be on the roof for this.
- Start low and work up. Begin well below the suspected area and isolate one small section at a time.
- Run water for five to ten minutes per section. Rushing is the most common mistake. Water needs time to find its path, and moving too fast means you flood everything and learn nothing.
- Move up in small increments. Test below a penetration, then at it, then above it. The moment the attic observer reports water, stop. You have found it.
- Do not test in freezing weather. Obvious, but worth saying. Ice on a roof and water in a wall cavity are both bad outcomes.
If you find nothing after a thorough test, the problem may be condensation rather than intrusion, which points to attic ventilation. Our overview of roof vent types explains what balanced intake and exhaust looks like.
What not to do: the caulk reflex
The instinct when you find a suspicious spot is to seal it. Resist it. Roofing cement and caulk are legitimate materials in specific, small, temporary applications, and they are genuinely destructive when used as a general purpose fix.
- Sealant is not a roofing system. A roof sheds water through overlapping layers. Caulk resists water by adhesion, and adhesion fails under UV, freeze-thaw, and thermal movement, usually within a season or two.
- It hides the evidence. A caulked area is much harder to diagnose later, and it can complicate an insurance claim by looking like a prior failed repair.
- It traps water. Sealing the wrong side of a flashing detail can dam water inside the assembly, making a small leak considerably worse.
- Black roofing cement smeared across shingles is a resale problem. Every home inspector reads it as deferred maintenance.
The right temporary measure is a properly fastened tarp over the area while you wait for a real repair. See roof leak repair for how a permanent fix is done.
Why an unfixed autumn leak becomes a midwinter ice dam
This is the reason for the timing of this article. An October leak and a February disaster are frequently the same defect at different points in the season.
Water entering the roof assembly in fall soaks the decking and, critically, the insulation beneath it. Wet insulation loses most of its R-value, which means more heat escapes through that spot into the attic. More escaping heat melts more snow on the roof above it. That meltwater runs to the cold eave and refreezes, building an ice dam. The dam holds standing water against the roof, which drives more water into the same already saturated area.
The leak feeds the ice dam, and the ice dam feeds the leak. By February you are no longer dealing with a cracked vent boot; you are dealing with saturated insulation, compromised decking, ceiling damage, and possible mold. The fix in October is often a couple hundred dollars. The same problem in February is a different conversation entirely, and it is why we cover prevention in our post on protecting your roof from winter weather.
Request Same-Week Leak Diagnosis Before the First Hard Freeze
Frequently Asked Questions
How do I find where my roof is leaking?
Start in the attic on a dry day. Trace water staining on the rafters and deck upward to the highest point of moisture, since water runs down framing before it drips. Measure that spot from the ridge and gable, then inspect the roof directly above it.
How do I check for roof leaks without going on the roof?
Look for daylight through the attic deck with the lights off, scan rafters for staining and rusted nail tips, check ceilings and the tops of exterior walls for discoloration, and inspect gutters for granule buildup from the ground.
How much does it cost to repair a roof leak?
Small repairs such as a cracked vent boot or a section of step flashing commonly run a few hundred dollars. Costs rise substantially when decking has rotted or when the leak has saturated insulation and drywall.
Why is my ceiling stain not under the hole in my roof?
Water lands on the deck or a rafter and runs downhill along the framing before it falls. It commonly travels ten feet or more, which is why the entry point is nearly always uphill from the visible stain.
Can I just caulk a roof leak?
Only as a short term measure, and even then sparingly. Sealant fails under UV and freeze-thaw, hides the evidence needed to diagnose the real problem, and can trap water inside the assembly. A fastened tarp is a better temporary fix.